ASP.NET Core Web API Architecture: A Lightweight Starting Point
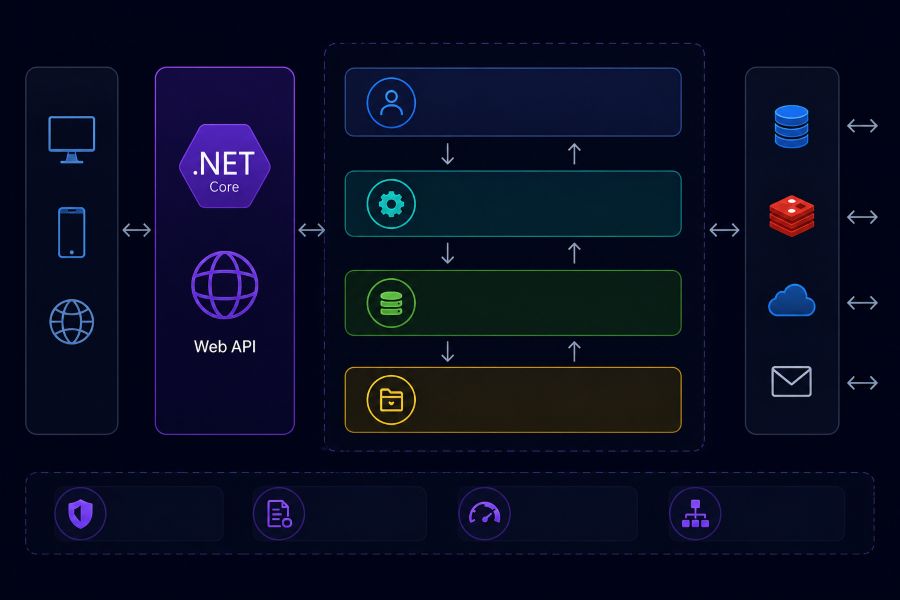
How much architecture does an ASP.NET Core Web API actually need? This is always the question when starting a new project and how to approach it can have a significant impact on how maintainable the project becomes as it evolves.
How to split the application into components without creating unnecessary complexity? Components should be small enough to have a clear responsibility, but not so small that every responsibility becomes its own project that can make entire solution harder to understand and increase dependencies.
The goal is to not create the maximum number of modules, but to establish clear boundaries around responsibilities and keeping the solution easy to understand and evolve in the future. A component should be extracted when its responsibility, complexity, or reuse justifies the additional boundary.
Throughout the article, I use module to describe a logical responsibility such as IAM or API, while project refers to the physical .NET project containing that module. Component, on the other hand is a logical unit that is part of the module, like Authentication component is part of IAM module.
The article intentionally shows only code snippets that are helpful for explaining some of the decisions. The complete source code is available in the community blueprint.
Skeleton
On the left side we have a treeview with all projects that are contained inside the solution. We are starting with:
APIresponsible for HTTP handling.Identity Access Managementresponsible for user management.Businessresponsible for core business logic. You could ask then ‘whyIAMis not part of theBusiness’? It’s not becauseBusinessmodule should be responsible only for core business workflows and we do not mix here technicalities around user/role/claims management.Infrashould serve for handling external configuration, email service, jobs, everything what is needed for app to operate but not strictly bound to business business.DBis responsible for persistence and internally it uses EF Core. Other modules consume it only where their responsibilities require persistence access.-
Sharedmodule is basically common data/config/constants used byAPI,IAMandInfra. On the other handSharedshould not become a general-purpose dumping ground for all models, helpers, constants, or utilities that don’t have a clear shared responsibility. DB.Migrationsis the place where all database migrations are handled.
On the right side we have shown the basic request flow between different modules. We are starting with the API, and if needed, going down to Identity Access Management or Business or Infra, and finally to DB if persistence is required.
API acts as an interface towards external clients and at the same time an entry point in the application. It contains, in addition to standard Controllers, also the implementation of versioning, exception handling middleware, configuration for the rate limiting, and validation of the inputs.
The idea behind placing all these additions here in the API is to have them as close as possible to the place where they operate. There is no reason to put them in separate shared module or similar. There isn’t much code here, just one-two classes in most cases, so we don’t need to introduce additional complexity if not needed. If the code around them evolves in the future, they can be easily extracted out of the API. Below is shown the folder structure.
Let us have a look on Program.cs.
var builder = WebApplication.CreateBuilder(args);

// Add services to the container.
builder.Services.AddControllers();

builder.Services.Configure<AppSettings>(builder.Configuration);
var connectionString = builder.Configuration.GetConnectionString(nameof(ConnectionStrings.DefaultConnection))!;

builder.Services.ConfigureOptimalMigrations(connectionString);
builder.Logging.ClearProviders().AddOptimalLogger();
builder.Services.AddOptimalSwaggerVersioning();
builder.Services.AddOptimalDbContext(connectionString);
builder.Services.AddBusinessServices();
builder.Services.AddInfraServices();
builder.Services.AddIAMServices();
builder.Services.AddOptimalRateLimiter();
builder.Services.AddValidators();

builder.Services.AddOptimalAuthentication(builder.Configuration.Get<AppSettings>()!.Jwt);
builder.Services.AddAuthorization();

var app = builder.Build();

app.UseMiddleware<ExceptionHandlingMiddleware>();

app.Services.RunPendingOptimalMigrations();

if (app.Environment.IsDevelopment())
{
    app.UseOptimalSwagger();
}

app.UseHttpsRedirection();

app.UseAuthentication();

app.UseAuthorization();

app.UseRateLimiter();

app.MapControllers();

app.Run();
Thanks to extension methods, Program.cs looks really light and so easy to read. The goal is for each module to have a clear responsibility and for the place where everything is wired up to operate at the higher abstraction, without knowing the implementation details of individual modules. That is in the end the goal of this architectural approach, to have all modules and components handle just one thing on just one level of abstraction. All Extensions logic is in the end moved to the component where it belongs.
In the next sections, we will look at each of these parts in more detail. Each chapter is showing firstly which files are involved there, then part of configuration if needed, and then concrete code snippets covering the explanations.
Swagger & API Versioning
Versioning in general is helping an API to evolve over time but at the same time keeping the older versions functional and not breaking existing clients. We achieve this by defining clear folder structure with version numbers inside the Controllers folder and couple of extensions that will support it. Below is shown how we define rules for the versioning and how to integrate it with swagger docs in order to have full overview of the implemented endpoints nicely grouped by versions. Here, we are also supporting controllers that do not have to be versioned. They would be inside the Controllers folder but outside of any version folders.
In OptimalSwaggerExtensions.cs and OptimalSwaggerOptions.cs we are defining how swagger docs are being grouped and generated and which versioning rules will be applied.
public static class OptimalSwaggerExtensions
{
   ...

        app.UseSwaggerUI(options =>
        {
            options.SwaggerEndpoint("/swagger/v1/swagger.json", "API v1.0");
            options.SwaggerEndpoint("/swagger/v1.1/swagger.json", "API v1.1");
            options.SwaggerEndpoint("/swagger/common/swagger.json", "Common API");
        });
    ...
}
Rate Limiting
Web API needs a mechanism to defend itself from abnormal amount of the requests that could degrade availability or allow some clients to consume resources disproportionally. It can help maintain stability and overall performance. Here, the rate limiting is handled at the very beginning in the API module using simple FixedWindowLimiter. It can be easily changed or extended by changing RateLimiterExtensions.cs only. Keep in mind that the values defined here for PermitLimit and QueueLimit are just for showing purpose. Real limits should be selected according to your own preferences and expected traffic.
More examples of the supported ways on rate limiting can be found at official microsoft docs https://learn.microsoft.com/en-us/aspnet/core/performance/rate-limit?view=aspnetcore-10.0
public static class RateLimiterExtensions
{
    public static IServiceCollection AddOptimalRateLimiter(this IServiceCollection services)
    {
        services.AddRateLimiter(options =>
        {
            options.GlobalLimiter =
                PartitionedRateLimiter.Create<HttpContext, string>(
                    httpContext =>
                    {
                        var partitionKey = GetPartitionKey(httpContext);

                        return RateLimitPartition.GetFixedWindowLimiter(
                                partitionKey,
                                _ => new FixedWindowRateLimiterOptions
                                {
                                    AutoReplenishment = true,
                                    PermitLimit = 10,
                                    QueueLimit = 0,
                                    Window = TimeSpan.FromMinutes(1)
                                });
                    });

            options.RejectionStatusCode = StatusCodes.Status429TooManyRequests;
        });

        return services;
    }

    private static string GetPartitionKey(HttpContext context)
    {
        if (context.User.Identity?.IsAuthenticated == true)
        {
            return $"user:{context.User.Identity.Name}";
        }

        var ipAddress = context.Connection.RemoteIpAddress?.ToString();

        return $"ip:{ipAddress ?? "unknown"}";
    }
}
Logging & Exception Handling
...

"Logging": {
  "Database": {
    "Enabled": "true",
    "Level": "Warning"
  },
  "DataDog": {
    "Enabled": "false",
    "Level": "Info"
  },
  "Elastic": {
    "Enabled": "false",
    "Level": "Info"
  },
  "File": {
    "Enabled": "false",
    "Level": "Info"
  }
}
...
Logging is a needed diagnostic tool which helps to trace how application behaves in the production environment. Here, in this blueprint, we are showing it together with error handling because at this point we are only logging exceptions. As the application evolves, it is up to the developer to extend it and provide more context in it.
For the logging purpose, we have used here Serilog library which is used through IOptimalLogger as an abstraction and for now only database logging is enabled. For using other logging targets or other logging library we can simply redefine a little bit LoggerBuilder.cs or OptimalLogger.cs and that would be enough. You can refer to one of my older articles if you want to take a look at NLog implementation and adapt it here. What is worth to mention here is that I made logger to always log errors in the ErrorLog regardless of configuration. This is done because of the need to have all errors on one place for eventual error tracking dashboards and error management.
public static class LoggerBuilder
{
    public static Serilog.ILogger Build(AppSettings appSettings)
    {
        return new LoggerConfiguration()
            .ConfigureDbTarget(appSettings)
            .ConfigureFileTarget(appSettings)
            .ConfigureDatadog(appSettings)
            .ConfigureElasticSearch(appSettings)
            .CreateLogger();
    }

    ...
}
public static class LoggerExtensions
{
    public static IServiceCollection AddOptimalLogger(this ILoggingBuilder logBuilder)
    {
        return logBuilder.Services.AddSingleton<IOptimalLogger, OptimalLogger>();
    }

}
OptimalLogger is injected as a singleton because it is suitable here, as it relies on Serilog which is also singleton in the background, and finally, it can be easily mocked for testing. OptimalLogger is implementing IDisposable interface disposing underlying Serilog because we are relying on DI Container to call it when releasing resources.
public interface IOptimalLogger
{
    public void Info(string message);
    public void Error(string message);
    public void Warn(string message);
    public void Debug(string message);
    public void Verbose(string message);
    public void Error(Exception ex, string message);
}

public class OptimalLogger : IOptimalLogger, IDisposable
{

    private Serilog.ILogger _logger;
    public OptimalLogger(IOptions<AppSettings> appSettings)
    {
        _logger = LoggerBuilder.Build(appSettings.Value);
    }
    ...
    public void Dispose()
    {
        ((IDisposable)_logger).Dispose();
    }

}
Furthermore, we want our Web API to always return a meaningful response, even when some unexpected behavior occurs and exception being thrown. Below, we are using unified ProblemDetails that should be returned in this case. After that is shown ExceptionHandlingMiddleware which is used as interceptor in case when unhandled exception occurs. In the middleware, when exception occurs, we are logging the thrown exception in the database if needed, and returning the meaningful response to the client.
public class ExceptionHandlingMiddleware
{
    ...

     private async Task HandleExceptionAsync(HttpContext context, IOptimalLogger logger, Exception ex)
    {
        ProblemDetails response;

        switch (ex)
        {
            case ValidationException validationEx:
                response = CreateErrorResponse(StatusCodes.Status400BadRequest, "VALIDATION_FAILED", ex.Message);
                break;

            case NotFoundException notFoundEx:
                logger.Error(notFoundEx, notFoundEx.Message);
                response = CreateErrorResponse(StatusCodes.Status404NotFound, "NOT_FOUND", ex.Message);
                break;
            case UnauthorizedException unauthorizedEx:
                response = CreateErrorResponse(StatusCodes.Status401Unauthorized, unauthorizedEx.Code, ex.Message);
                break;
            default:
                logger.Error(ex, ex.Message);
                response = CreateErrorResponse(StatusCodes.Status500InternalServerError, "INTERNAL_ERROR", "An unexpected error occurred.");
                break;

        }

        context.Response.StatusCode = response.Status;
        context.Response.ContentType = "application/json";

        await context.Response.WriteAsJsonAsync(response);
    }


    private static ProblemDetails CreateErrorResponse(int status, string code, string message)
    {
        return new ProblemDetails
        {
            Status = status,
            Detail = message,
            Title = code
        };
    }
}
JWT Authentication
"Jwt": {
    "Key": "",
    "Issuer": "optimalcoder.net",
    "Audiences": [
        ""
    ],
    "TokenValidityInMinutes": 1,
    "RefreshTokenValidityInDays": 7
}
This functionality spans across all three levels by its request flow, but its every component is responsible only for single topic and its level of abstraction. In API module, we have AuthenticationController like an interface to outside world.
 [Route("api/[controller]")]
 [ApiController]
 [ApiExplorerSettings(GroupName = "common")]
 public class AuthenticationController : ControllerBase
 {
    ...

    [AllowAnonymous]
    [HttpPost("Login")]
    public IActionResult Login([FromBody] UserLoginModel user)
    {
        ...
        var tokenModel = _service.Login(user);
        return Ok(new { TokenModel = tokenModel });
    }

    [AllowAnonymous]
    [HttpPost("RefreshToken")]
    public IActionResult RefreshToken([FromBody] TokenRequest request)
    {
        ...
        var tokenResponse = _service.RefreshToken(request);

        return Ok(tokenResponse);
    }
 }
Here, in the API, we will just add parts to support Authentication functionality:
- Support Auth on Swagger:
 public class OptimalSwaggerOptions : IConfigureOptions<SwaggerGenOptions>
 {
   ...

     public void Configure(SwaggerGenOptions options)
     {
       ...

         options.AddSecurityDefinition(JwtBearerDefaults.AuthenticationScheme, CreateAuthScheme());
         options.AddSecurityRequirement(document => new OpenApiSecurityRequirement
         {
             [new OpenApiSecuritySchemeReference(JwtBearerDefaults.AuthenticationScheme, document)] = []
         });

     }
 }
- Handle exceptions where one of the exception type is also
UnauthorizedException
public class ExceptionHandlingMiddleware
{
    ...

    private async Task HandleExceptionAsync(HttpContext context, IOptimalLogger logger, Exception ex)
    {
        ProblemDetails response;

        switch (ex)
        {
            ...
            case UnauthorizedException unauthorizedEx:
                response = CreateErrorResponse(StatusCodes.Status401Unauthorized, unauthorizedEx.Code, ex.Message);
                break;
            ...

        }

        ...
    }
    ...
}
With the extensions, we are encapsulating the registration of needed services and authentication scheme.
public static class IAMExtensions
{
    public static IServiceCollection AddIAMServices(this IServiceCollection services)
    {
        services.AddScoped<IAuthenticationService, AuthenticationService>();
        services.AddScoped<IPasswordHasher<User>, PasswordHasher<User>>();
        services.AddScoped<IPasswordService, PasswordService>();
        return services;
    }

    public static IServiceCollection AddOptimalAuthentication(this IServiceCollection services, Jwt jwt)
    {
        services.AddAuthentication(JwtBearerDefaults.AuthenticationScheme)
                .AddJwtBearer(jwtOptions =>
                {
                    jwtOptions.TokenValidationParameters = new TokenValidationParameters
                    {
                        ValidateIssuer = true,
                        ValidateAudience = true,
                        ValidateLifetime = true,
                        ValidateIssuerSigningKey = true,
                        ValidAudiences = jwt.Audiences,
                        ValidIssuer = jwt.Issuer,
                        IssuerSigningKey = new SymmetricSecurityKey(Encoding.UTF8.GetBytes(jwt.Key))
                    };
                });

        return services;
    }
}
DB Migration is mentioned in the source treeview structure at the beginning only to provide some initial user data in db on which we can work. For more insights into migrations, please take a look here Fluent Migrations and their usage inside the Web API setup.
Furthermore, DB module is responsible for maintaining UserDbContext and its entities. Here has been chosen naturally EF Core with its built in repository pattern instead of building one more layer (Repository layer) on top of it. We needed to redefine OnModelCreating here, because we want to keep naming as we want, with flexibility to create table names using migration with the names as we prefer. This gives much more flexibility and at the same time more control over the conventional EF way.
public class UserDbContext : DbContext
{
    ...

    protected override void OnModelCreating(ModelBuilder modelBuilder)
    {
        modelBuilder.Entity<User>()
             .HasMany(u => u.Roles)
             .WithMany(r => r.Users)
             .UsingEntity<Dictionary<string, object>>(
                 "UserRole",
                 right => right.HasOne<Role>()
                               .WithMany()
                               .HasForeignKey("RoleId"),
                 left => left.HasOne<User>()
                             .WithMany()
                             .HasForeignKey("UserId"),
                 join =>
                 {
                     join.HasKey("UserId", "RoleId");
                 });
    }

}
If you are interested in a little bit different approach with some alternative lighter variant of ORM, I have written also an article for using Dapper and SqlKata inside the DB repositories and services, so you can check that out as well and incorporate that easily in the existing code structure.
IAM module is responsible for consuming UserDbContext and for the logic around authentication inside the AuthenticationService. TokenModel and UserLoginModel are data models for the mentioned purpose, and their place is here because they need to be nearest to the code which is using them. They don’t belong to some shared library with models, or similar, because this is the only place where they are actually used (Except the validation which is special case because it is just definition of the rules without some concrete functionality).
More detailed explanation on JWT can be found here.
Validation
Validation component is used in the API module to check input models for the controllers. Validation component therefore is incorporated into API only. No need for it in additional module or something. All data holder classes are already visible in API, so no need also for additional dependencies. Here, we have used FluentValidation library because of its flexibility and easy rules chaining.
 public class TokenRequestValidator : AbstractValidator<TokenRequest>
 {
     public TokenRequestValidator()
     {
         RuleFor(x => x.RefreshToken).NotNull().NotEmpty().MinimumLength(8);
     }
 }

 public class UserLoginModelValidator : AbstractValidator<UserLoginModel>
 {
     public UserLoginModelValidator()
     {
         RuleFor(x => x.UserName)
             .NotNull()
             .NotEmpty()
             .MinimumLength(6)
             .Matches("^[a-zA-Z0-9_]+$");

         RuleFor(x => x.Password)
             .NotNull()
             .NotEmpty()
             .MinimumLength(8)
             .Matches("[A-Z]").WithMessage("Must contain uppercase")
             .Matches("[a-z]").WithMessage("Must contain lowercase")
             .Matches("[0-9]").WithMessage("Must contain a digit")
             .Matches("[^a-zA-Z0-9]").WithMessage("Must contain a special char");

     }
 }

 public static class ValidationExtensions
 {
     public static IServiceCollection AddValidators(this IServiceCollection services)
     {
        services.AddScoped<IValidator<UserLoginModel>, UserLoginModelValidator>();
        services.AddScoped<IValidator<TokenRequest>, TokenRequestValidator>();

         return services;
     }
 }
Usage of these validators is shown inside the AuthenticationController.cs
[Route("api/[controller]")]
[ApiController]
[ApiExplorerSettings(GroupName = "common")]
private readonly IAuthenticationService _service;
private readonly IValidator<UserLoginModel> _loginModelValidator;
private readonly IValidator<TokenRequest> _tokenModelValidator;
public AuthenticationController(IAuthenticationService service, IValidator<UserLoginModel> loginModelValidator, IValidator<TokenRequest> tokenModelValidator)
{
    _service = service;
    _loginModelValidator = loginModelValidator;
    _tokenModelValidator = tokenModelValidator;

}

[AllowAnonymous]
[HttpPost("Login")]
public IActionResult Login([FromBody] UserLoginModel user)
{
    var validation = _loginModelValidator.Validate(user);
    if (!validation.IsValid)
    {
        throw new ValidationException(validation.Errors);
    }
    ...
}

[AllowAnonymous]
[HttpPost("RefreshToken")]
public IActionResult RefreshToken([FromBody] TokenRequest request)
{
    var validation = _tokenModelValidator.Validate(request);

    if (!validation.IsValid)
    {
        throw new ValidationException(validation.Errors);
    }

   ...
}
So, inside the controller, we are firstly checking the input, and after successful validation, we can proceed with the services/business logic. In case of validation exception occurs, we have ExceptionMiddleware to take care of that, and to return to the client meaningful message result.
Additional Context
In order to keep everything structured and at the same time explain everything in detail, I will mention here also the things which are omitted in the previous chapters for the sake of their simplicity.
For the authentication example to be immediately usable, the blueprint also contains an initial user created as part of the database seed data. This allows the authentication endpoints to be tested directly after starting the application without having to implement a registration flow first.
The credentials for this user are provided in the repository documentation and are intended only for local development and demonstration purposes. They should never be reused in a deployed environment.
appsettings.json currently contains connection string and jwt key as plain strings, and this of course is just for the showing purpose. For the real application, you will need a way to store it somewhere in secrets, depending on your infrastructure around the API.
The same applies to some of the configuration values used throughout the blueprint. The values shown in the examples are there to demonstrate how the components are connected, not to represent production defaults. Things such as rate limits, token lifetime, logging levels and connection strings, should be adjusted according to the actual application, traffic, security requirements, and infrastructure.
Another important point is that this blueprint intentionally does not try to solve every possible concern that a production application might have. There is no message broker, distributed cache, background processing infrastructure, container orchestration, or complicated authorization model included by default. These are all useful technologies, but adding them to a starting template without a concrete requirement would work against the main idea of this architecture.
The same applies to the project boundaries. You might look at the solution and decide that some of the projects should be merged, or that some part should be extracted into its own project, and that is completely fine.
Conclusion
There is no single architecture that is optimal for every ASP.NET Core application. A small API, a SaaS platform, and a large distributed system will naturally have different requirements and therefore different architectural needs. What I wanted to demonstrate here is one practical middle ground. Enough structure to keep the code organized, but also light enough to be easily adapted as the application grows.
That is the principle behind this blueprint.
Want to check the complete implementation? The article focuses on the architectural decisions and the parts of the implementation that are useful for understanding. The Community Blueprint contains the complete working solution, including the project structure, configuration, authentication, validation, logging, database setup, migrations, tests, and supporting code. Explore the Community Blueprint →

Read More
- JWT Authentication in ASP.NET Core Web API: Access and Refresh Tokens
- Premature Optimization in Software Development: Examples, Risks, and Best Practices
- The Adapter Pattern in C#: Bridging Incompatible Interfaces
- API Versioning and Integration Testing in ASP.NET Core
- Clean Architecture in ASP.NET Core: Service & Repository Patterns